INTRO
Whether you’re back to work, seeing your girlfriends (finally!), getting active or just wanting to look #AMAZING this Winter…. Hayley has got you covered with her 4 look master class that is going to take you from drab to fab in a few quick & easy steps. Plus… get Hayley’s inside tips & tricks on how to nail the perfect pony tail, beachy waves & top knot!
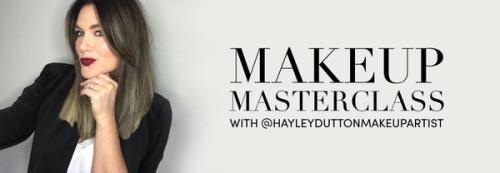
A LITTLE ABOUT HAYLEY…
I have been in the makeup and hair industry for over 7 years, including corporate, advertising and media, as well as presenting and educating all over Australia and New Zealand.
I’ve worked with amazing brands such as Rimmel London as their Head Makeup Artist and Covergirl’s Makeup Director, which has given me opportunities in so many exciting projects with celebrities and influencers.
When working with my muse it’s all about EMPOWERMENT and making everyone feel confident in their own skin… that kind of feeling that you can take on the world!
Let’s DO THIS!
Hayley x
We are all looking forward to a lil long lunch with the girls right? Make sure you hit lunch looking bang on trend with a wine stained lip, paired with epic satin skin and a beautiful fine winged line.
LETS DO THIS ….
Step 1: Apply a light layer of the Max Factor Face Finity All Day Flawless all over the face, you can layer up in any areas that might need a little more coverage such as under the eyes, nose and chin. This product has a built in primer so you can skip that step! This products has a beautiful satin finish and will keep you shine free through the day.
Step 2: If you are feeling a little tired, or just needing a little brighten up use your concealer to highlight the face under the eyes, under the nose to the corner of the mouth on each side and in the dip of the chin. I love the TruBlend Undercover Concealer for its staying power and super easy brush.
Step 3: Line your eyes from the inner corner to the outer corner, then add your wing to the outer corner. I really love using more of a liquid liner to achieve a statement wing, and I’m loving the Covergirl Get In Line Liner at the mo! for its fine tip and perfect weight formula. But if you aren't that great at the wing, start of with a pencil, you can easily blend it out if you make a mess off it.
Step 4: Apply at least 2 to 3 layers of Gucci Lash Buildable in Black, I always apply to the top and bottom lash lines for balance and to detract from any dark circles under the eyes.
Step 5: Apply your fave Bourjois Lipstick finish in a wine tone to your lips, I used the you can even dap a little on the the apples of your cheeks and blend upwards for a little flush of colour to the cheeks.
Step 6: Apply a little Highlight from the Covergirl Serving Sculpt Palette to the inner corners of the eyes, high points of the cheekbones and to the cupids bow for a little extra glow. This highlight really brings this look to life.
HAIR HOW TO: WORKING WITH NATURALLY CURLY HAIR
When you are thinking of what hair to wear with this look a cute pony for naturally curly hair works a treat.
I love to pull hair up into pony that sits just on the crown, and I always keep some soft curls out around the temples, fringe area and a little at the back to keep it looking undone.
My fave products to use in naturally curly hair are the Wella Nutricurls range, the Curl Shaper, Curlier Balm, Fresh Up and Milky Waves all aimed at nourishing and defining curls for both damp and dry hair after washing and between washes - REVOLUTIONARY!
Look #2
Get Active But Make It Cool
Its nice to look and feel super fresh whatever work out you are into. I often find that my work out get up can last the full day, especially on these WFH days!
Just because your are working out doesn’t necessarily mean you need to go completely bare! I like to use light liquid or cream based products to keep the look natural but glowy!
OK HOW DO WE GET THERE …
Step 1: We want to keep our base light so I usually light tinted moisturiser, BB Cream or a water based foundation. My favourite options here are the Laura Mercier Tinted Moisturiser, Bourjois Healthy Mix BB Cream or Covergirl TruBlend Liquid Makeup.
Step 2: When you are opting for a more natural look defining the eyebrows is a game changer makes a massive difference when you can define the brows and lashes! So a soft fluffy brow is what you want to achieve! You can do this by using feather light strokes starting from the beginning of the brow and working outwards and down the tail. My faves are the Covergirl Micro-Fine Fill & Define Brow Pencil and the Rimmel London Brow Pro Micro Pen.
If you want to add a little more definition and colour l will always opt for a cream product on the cheeks and eyes, just for a subtle hint of colour that melts into the skin. I am loving the Rimmel Jelly products at the moment the liquid blush and eyeshadow are a nice way to add a subtle pop of colour to the face.
Step 3: 3 x coats of the Scandaleyes Volume on Demand Waterproof will help to separate and define lashes rather than adding to much volume. We just want an undetectable definition for a workout mascara and definitely a waterproof formula to guard against any smudging or running.
HAIR HOW TO: TOP KNOT or PONY
The Top Knot and Pony are CLASSIC workout hair!
I always say with workout hair, keep it undone. So don't over think these styles.
For a Top Knot I will always pop the hair in a pony just under the crown securing with an elastic, then simply wrap the hair around the pony and either secure with another elastic or you can use pins to lock in.
Just be sure to fluff the bun out softly, again giving it more of that “just thrown up” kinda lived in feel - we aren't going for a ballerina style here.
With the Pony I prefer to sit this slightly higher, so at the crown, after securing with an elastic I usually pull the hair out and shift the hair higher so that it automatically creates a little body at the top. Another messy feel, so feel free to pull a few bits of hair out around the temples, fringe if you have one as well as around the hairline around the nape.
You can do either of these styles with straight, wavy or curly hair.
For work you want a look that lasts all day long, that looks profesh and not to over done - really we just want to highlight those gorgeous features!
Step 1: We want to go in with a long lasting primer, to assist with longevity through the day. I love either the Rimmel Lasting Matte Primer if you tend to get a little oily through the day, otherwise if you have normal to dry skin try the Rimmel Lasting Radiance Primer.
Step 2: Apply a light layer of the Rimmel Lasting Radiance all over the face, you can layer up in any areas that might need a little more coverage such as under the eyes, nose and chin. If you need a little brighten up, add in your concealer under the eyes for a quick pick me up. I am going to use the Rimmel Lasting Radiance Concealer as I love the light liquid finish so I don't feel dry and can conceal any fine lines under the eyes.
Step 3: For a quick colour to the eyes I love using a cream shadow stick that I can apply and blend out on the fly, I also find that a liquid or cream based eye colour that sets means I have longer staying power in my eye shadow and less creasing! My favourite is to use the Rimmel Insta Duo Contour Stick on the eyes or NARS Velvet Shadow Stick, Rimmel Magnif’Eyes Eyeshadow or the Covergirl Exhibitionist Liquid Eyeshadow if you like it a little more of a shimmer finish.
If a cream shadow scares you EASY just go for your usual powder eyeshadow palette. I usually opt for more neutral earthy brown and bronze tones as they are flattering to most skin types and have a more subtle feel.
Apply one sweep of colour on the eyelids, balance it out with a fine dusting under the bottom lashline. If you are feeling like you need a little extra definition add a slightly darker colour along the top lash line and in the outer corners of the eyes. Keep it light and BLEND BABY!
Step 4: A nude lip is definitely the go! I am loving the Gucci Satin Lip Colour in 402 and doubling this up as a blush after applying to my lips, just dab onto the apples and blend upward and outward. It gives a really beautiful balance to the face when you use the same colour on the lips and cheeks and sets softly with its satin finish! DIVINE!
Step 5: Apply at least 2 to 3 layers of Max Factor False Lash Effect with the primer first to ensure lashes are protected as well as achieving maximum volume! I always apply to the top and bottom lash lines for balance and to detract from any dark circles under the eyes.
HAIR HOW TO: SHORT HAIR LOOSE WAVES
Creating loose waves is super easy, and such a nice way to add texture as well as jooj things up!
Styling products are your hero here I always use a volumising product at the roots before I dry my hair, the Wella Sugar Lift is amazing and then a product you can add to the mid lengths and ends to help hold the waves and remove any frizz from heat styling. The Wella Perfect Me is great, if you have really soft hair and need to add a little more texture before styling for hold an Ocean Spritz is also a great way to add texture without adding loosing movement which can happen when you opt for heave texture powders and sprays.
Once you have added your products and dried your hair choose your tong size depending on your hair length, I almost always go for a medium sized tong and I do at least three rows and five sections in each row across the head.
Always tong away from your face, and leave the ends out so giving you more of a modern edge rather than a bouncy curl.
Step 1: Apply your fave primer all over the face to ensure your foundation has staying power.
Step 2: Apply a light layer of the Bourjois Always Fabulous all over the face, it has a lightweight formula but with a 24 hour wear! You can layer up in any areas that might need a little more coverage such as under the eyes, nose and chin.
Step 3: For a brighten up use your concealer to highlight the face under the eyes, under the nose to the corner of the mouth on each side and in the dip of the chin. Any of your fave concealers will work, I love the Bourjois Always Fabulous Concealer with its long wearing velvet finish for a night out.
Step 4: I always like to smoke things up a little for a night out, so go for whatever colour you like bronze and earthy colours are always safe, but you might like to experiment with some pops of colour raisin, plums and purple shades are such a beautiful way to add colour this season, you might like to stick with your grey and black tones - whatever makes you feel GORGE!
The Rimmel London Mini Power Palettes are AMAZING loving the colour options in the Queen and Fierce Palettes, as is the Covergirl TruNaked Eyeshadow Sunset Palette.
I will always apply to the eyelid and below the lash line for a smokier finish! You can also add deeper shades to the outer corners or close to the lash line on the top and the bottom to add drama.
I will usually add black liner to finish the smoked out look.
Step 5: Apply at least 3 layers of mascara to the top and bottom lashline. I am loving the Covergirl Exhibitionist Mascara - find it gives me that false lash effect I need for a night out!
Step 6: Finish with your favourite lip, really depends on your mood here or if you are more of a pop of colour lipped woman or more of a nude!
HAIR HOW TO: HALF UP or HALF UP TOP KNOT
Half Up or Half Up Top Knot is such an easy way to mix up your look without committing too much! Its an especially nice option if you don't like the idea of your hair up and away from your face.
I always recommend that you collect the hair from just above the ears with any half up option, you really want only a third of your hair up for this type of look.
You can either pull the hair completely away from the face, or leave your fringe out, there are really so many ways you can wear this type of look.
Secure either sides at the centre at the back for your half up with an elastic, you can wiggle this around slightly upwards to add a little volume.
If you are doing top knot, I would usually place this quite high up on the head so you can see it from the front, again have a play and see what works for you. I generally secure in a small pony with an elastic and then use an elastic or pins to secure and shape the top knot. This will all depend on how fluffy or tight you like it to look.
Its all about experimenting! Have fun!!